How to Install an Electric Security Fence
by Robert Fox
If you want to keep livestock contained, or keep wild animals away from your garden, installing an electric fence is an excellent solution.
Electric fences are an effective and humane option to build protection around a field or garden and are easy to install and maintain. Here’s how to install an electric security fence in three steps, or rather parts.
Contents
PART 1 – MAKE PREPARATIONS
1. Prepare your assembly plan.
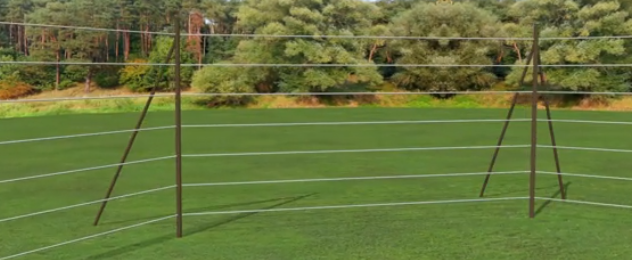
What will be the size of the enclosure or park for the purpose you intend to use? Determine the number of animals you want to keep as well as the spacing and length of wire required for your installation.
- If you already have an idea of where you are going to place your fence, take the dimensions and decide on a suitable height for the fence.
- Determine the spacing between the posts, as well as the height of the fence and therefore the required wire length. You can buy wire per meter at the best price in DIY store.
2. Determine the number of brace corners you will need.
Each corner of the fence should be supported with a corner piece. A single brace will suffice corners and ends for fences with up to 6 rows of wire. Fences with at least 7 rows of wire should be supported with double brace.
3. Get enough stakes.
You are going to need a lot of stakes, especially if your fence is going to be long. Wood stakes are an efficient and environmentally friendly solution, even if they tend to degrade over time, while metal stakes are easier to install, but also more expensive.
4. Choose your fence charger.
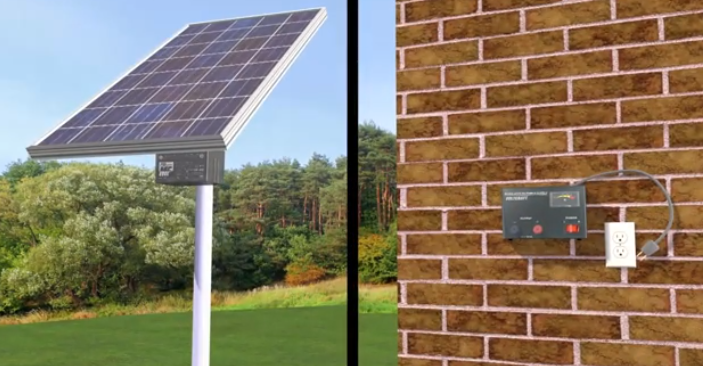
To keep your electric fence energized, you are going to need a charger which will constantly power your wires with electricity. Solar charges don’t require an electric outlet to operate but rather a sufficient amount of sunlight and can, therefore, be a great option if you live in a sunny area. Electric chargers need to be connected to an AC outlet.
Do not buy a charger based on the electrified length data, but rather on the energy per pulse, in joules, that it can deliver.
A greater number of joules does not mean that the discharge will be more powerful when an animal will touch the fence. Instead, it means that the electric current will be more consistent, making the purchase of a charger with high joules an excellent investment.
If your fence covers 5 acres, you will need a joule at the minimum.
5. Choose the wire.
Here’s the option of choosing a straight wire available in several thicknesses and electric fence tape. Tape is more visible and therefore less dangerous than wire.
Ensuring proper visibility of the fence is one of the most important points in the installation of an electric security fence. 1.5 or 2-inch poly tape, rope, or braid will be suitable in most cases, as well as the color wire which is clearly visible and easy to install. Using tape less than 2 cm wide is not recommended for any enclosing fence, such as for horses or to keep deer away.
PART 2 – INSTALL THE FENCE
1. Install the charger.
Choose a safe place, near an electrical outlet, to install your energizer or a sunny place for your solar charger.
To protect the charger, attach it to a peg or wall. Make sure you don’t turn on the charger until the fence is installed.
2. Install the ground stake.
To install your fence, you will need at least one ground stake of 1.8m (6 feet) at the minimum. Place the stake near the charger and use a post hole digger to set it. Leave about 5 cm of the stake above the ground. When installing your fence, it is recommended to add a second stake at a distance of 3 to 6 m from the first one.
3. Attach a grounding wire.
The cable will connect the earth terminal of the charger to all ground stakes. Secure the wire to the stakes using a grounding clamp.
4. Install the fence stakes.
Mark a straight line for the fence stakes using a string. Then place them in the ground using a post hole digger. Generally, it is recommended to drive 1/3 of the stakes into the ground.
Do not use too many stakes. A common mistake is to install too many stakes, too close, thinking that the fence will be stronger. However, if you plan to install your stakes at a distance of 40 feet, make sure you install stays along the wire to keep them apart and make greater stability.
5. Reinforce stakes in corners and openings.
To properly install your electric fence, the stakes that receive the most mechanical stress must be reinforced with braces, a cement base or an anchor.
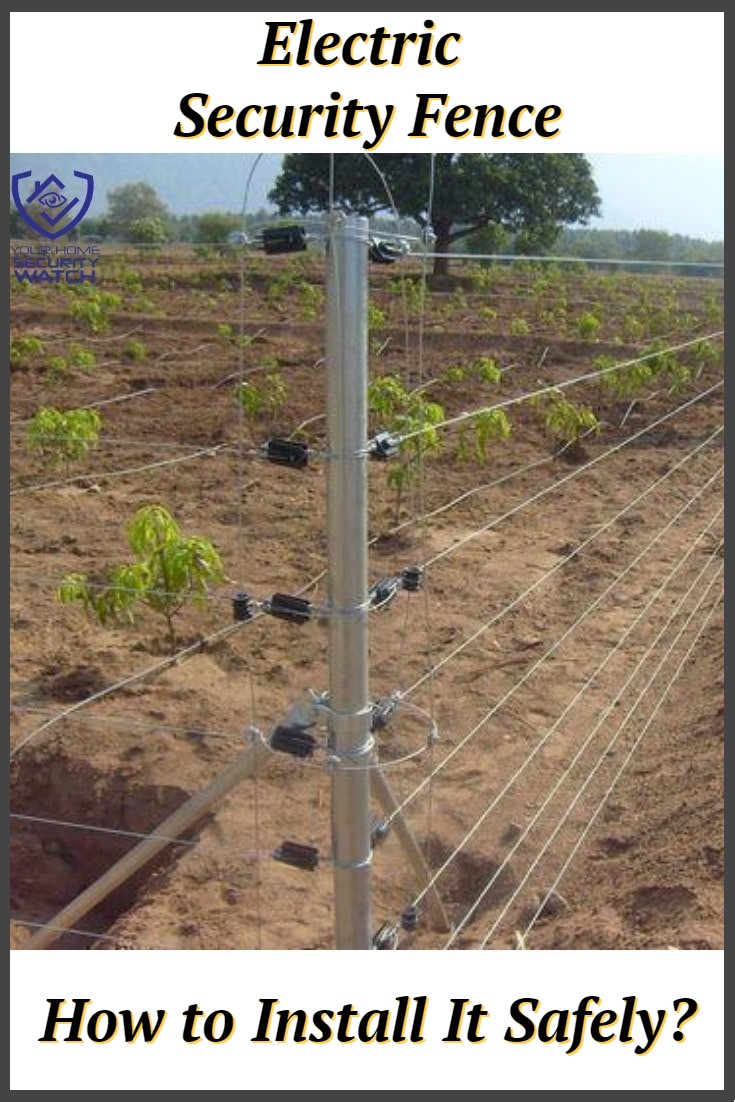
A majority of cow breeders use floating diagonal braces, which are solid bars attached on one side to 2/3 of the visible part of the stakes and on the other to the ground with an approximate angle of 45 degrees.
6. Install the insulators.
Since you are going to have to maintain the voltage in the wires and thus electrically isolate them from the stakes, insulators are necessary. The type of insulator will depend on the type of electric fence you are going to buy and fencing manufacturers typically include insulators from their manufacture with their products.
The most common are insulators that allow the rope or braided style of fencing to slide through, preventing any harmful friction.
7. Pass the thread.
Using the connector clamps provided with your fence, secure the wires to your stakes. Start with the farthest stake from the charger and attach the number of wires you plan to have.
Never wrap the wire around the stake as it will loosen too easily and cause corrosion. Use the isolators supplied by the manufacturer.
Pull the wires as tight as you can at the anchor end, but make sure you don’t put too much tension to prevent it from breaking and causing injury.
PART 3 – TESTING THE FENCE
1. Turn the charger on.
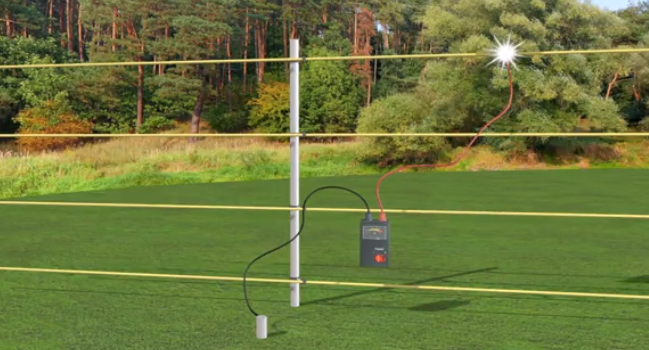
Test the wires using a voltmeter and make sure that the electricity circulates well. Jot down the voltage and keep them well on hand to be able to compare them every day. Depending on the power of your charger, you should read between 6,000 and 10,000 volts offline.
2. Electrify the line.
Use a 10 to 14-gauge jumper wire to connect the lines to each other and connect the upper line of your fence to the charger with another jumper wire. Check that all wires are properly connected before turning the power on.
3. Recheck the voltage.
After checking that everything is properly connected, check the voltage at the farthest point of the charger. You should see a slight drop in voltage, less than 2,000 volts, or it would mean that there is a short circuit or interference on your fence.
4. Schedule a daily voltage check.
It is recommended to check it regularly to prevent any voltage drop and to correct any necessary action. Moisture and growing vegetation can cause temporary leakage of current, which will provide lower voltages. If your voltage is below normal, it is time to perform a detailed inspection of your fence and eventually repair it.
5. Eliminate weeds.
Keep weeds, shrubs and bushes away from your fence, as they can cause drops in voltage. Remove all plants that grow near the fence and replenish a glyphosate herbicide to prevent proliferation.
Advice
- Attach a sign on your fence every 50 m to inform any walkers
- Check your wires at least twice a year using a voltmeter.
- Ensure the quality of your insulators. They must be UV resistant. The black color (addition of carbon black) is clearly preferable. This quality is then better resistant to ultraviolet rays.
- The material is important. The best are made of polyamide, more generally called nylon. The worst are made of PVC or LDPE (low-density polyethylene).
- PVC (Polyvinyl Chloride) – Slightly impact resistant.
- PP (Polypropylene) – Very good choice, but several forms – Copolymer form is the best. The homopolymeric form of polypropylene is harder and can withstand higher temperatures than HDPE.
- PE (Polyethylene) – Polyethylene is flexible, durable and tear resistant: Used for heavy duty bags. Problem: There are several qualities of PE, some of which are sensitive to cracks!
Conductive tapes. Make sure to inform about their strength, which needs to be at least 130 kg. In fact, the 130 kg have a very low resistance, others can go up to more than 500 kg.
- Never take white tapes, the most common, because they are less resistant to UV. Prefer them in yellow, green, brown, or other color.
- Their core is made of aluminum, stainless steel, galvan … so, make sure that they are compatible with the HV connection wire. Stainless steel is 40 times less conductive than Copper. Strength is determined by the tape itself, especially by the wires. The resistance, in Ω / m, should be lowest if the fence extends over great distances.
- Determining factors for choosing an electric fence wire. The length of the fence to be made will emphasize an essential characteristic of the wire, its electrical resistance (value expressed in ohm).
- Some examples of the value of the electrical resistance of the fence wires (over 1,000 meters).
- Galvanized wire “high tensile” Crapal Optimum diameter 2.5 mm – 50 ohms
- Galvanized wire “high tensile” Crapal 4 diameter 1.6 mm – 100 ohms
- Top Electroplating Wire Oviflex 9 – 120 ohms
- Electroplastic wire 3 conductors stainless steel – 10 000 ohms
- Insulated high voltage wire. The chargers work at voltages of 4,000 to 10,000 Volts, so the need for special High Voltage wire. Therefore, a normal copper ground wire is not suitable and above all, it is absolutely necessary to have a conductor identical to the one to which it will be connected: galva on galva or aluminum on aluminum. The copper causing the oxidation of the galva and the aluminum being oxidized by the galva. All oxidized by INOX. The wire must be provided for 10 000 Volts, double insulated and possibly provided for burial, if you work over long distances, its resistance in Ω / m is important. Specify the output power in Joules of the device: 5 joules maximum, if more, it is like reserve in case of long distances or heavy grassing, but in fact NEVER more than 5 joules in action!
- The closing handles. A simple handle combined with a spring would be more judicious.
- If the fence is close to a road or public space, the device must be approved.
- The power. Containing a cattle, a horse or a dog is easy.However, when it comes to sheep and guarding against the entry of the game it is more difficult. The choice of charger depends therefore on the species concerned, but also on the length of the fence and the conditions of the ground (vegetation). The power of a device is measured in Joules (J). The higher the joules value, the greater the energy of the electrical pulse. The pain felt by the animal is a function of the energy of impulse or energy delivered by the energizer.
- Tension is the 2nd criterion measured in volts (V). For big game, the main thing is to have a charging voltage under 500 ohms3 (criterion more reliable than the output voltage4) of at least 4,000 volts on all the wires of the installation. The procedure for obtaining a good grounding is as follows:
– Choose a wet place, using a ground, to push a 1.5 m long copper or galvanized steel grounding plug into the ground, adjusting the ground to the power of the earth it is a good rule of thumb to bury as many earthing posts as there are joules (energy of impulse) indicated on the charger, with distances of 2.5 m between pegs. For example, a 3-J charger requires 3 earth pegs of 1.5 m length.
– Then connect the peg (s) to the earth terminal of the energizer using a 2.5 mm diameter insulated plain wire.
– Use a cable tie that is specially adapted to attach the cable to the grounding pin (s). The electrical ground of an electric fence must be completely independent of a house or other electrical system and must be at least 20 m apart.
– On a fence close to a public roadway, it is obligatory to place a warning notice “Warning electric fence” every 50 m.
– Installation of a surge arrester is recommended to improve the safety of the device. In fact, any significant impact of lightning on the fence will kill any animal touching this fence even at the opposite end of the impact.
– NB : the grounding for this surge arrester must be better than that of the fence. You can also connect a wire from the fence to the ground with a battery cable, cut off current!
Warnings
- Never use barbed wire for electric fencing
- Never approach a fence during a thunderstorm
Elements Needed
- Electric or solar charger
- Electric fencing wire or tape
- Wood or metal posts
- Grounding post
- Sledgehammer or post slammer
- Grounding wire
- StringGrounding clamp
- Posthole digger
- Corner braces
- 10 to 14-gauge jumper wire
- Electric fence insulators
- Voltmeter
 |
 |
 |
 |

About Robert Fox
Rob Fox is a former hydro worker who used to teach self defence in Miami for 10 years. He's currently enjoying his retirement, playing cribbage and golf with his buddies, locksmithing and home security in his spare time. Rob is an avid reader, and has even written a few books on the subject of self defence.
Thoughts on "How to Install an Electric Security Fence"
 |
 |
 |
 |
You can Get FREE Gifts. Furthermore, Free Items here. Disable Ad Blocker to receive them all.
Once done, hit anything below
 |
 |
 |
 |